Lee Durston
MS, CBST,Director of Building Science
Jack Pearson
Building Science Specialist
BCRA
2106 Pacific Avenue, Suite 300Tacoma, WA 98402
Ph: 253-627-4367 www.bcradesign.com www.airbarriernews.com
Abstract
Over the past three years, the United States Army Corps of Engineers (USACE) has been phasing new building air-tightness requirements into Requests for Proposals (RFPs) for new construction on Army installations around the country. This requirement dictates that all new buildings be designed and constructed to include a continuous air barrier that must be tested for air leakage and pass a specific rating prior to building turnover. The USACE testing protocol and each new RFP specify that infrared thermography be used to assess the continuity of the air barrier and locate instances of air leakage from both sides of the building enclosure, creating one of the top two sources of thermography work called for in government RFPs at present. Following the lead of the USACE, state and city governments are beginning to adopt their own air tightness testing requirements for new commercial buildings, some of which will apply exclusively to mid and high-rise buildings (five stories or greater). As the height of the building increases, the dynamics of air flow and pressure distribution become more complex, requiring a more experienced testing agency to perform the air tightness test and infrared thermography. To date the largest test for the USACE was performed by BCRA on an eight-story office building at the Detroit Arsenal in October 2010. The building was constructed by Grainger Construction for the USACE and passed the air tightness requirement with a leakage rate 32% below the maximum allowed. The following paper will discuss the importance of air barriers and share BCRA’s findings regarding air tightness testing, infrared thermography as it applies to air tightness, and the results of the Detroit Arsenal Building 270 test.
Introduction
Amid the myriad attempts at energy conservation and building advancement, air barriers have recently been brought into view as an effective and viable solution towards better buildings. The International Energy Conservation Code (IECC) and several state energy codes – Massachusetts, Wisconsin, Michigan, and Washington, with more expected to follow – now require the use of air barriers in all new commercial and some residential construction. More importantly, energy efficiency and occupant comfort – two key ingredients of sustainable design – are driving the use of air barriers across a variety of market sectors. With today’s high cost of energy and concerns about Indoor Environmental Quality (IEQ), air barriers are one of several construction systems with a critical role to play. However, the form, function, and benefits of an air barrier are not always well understood by many professionals in the design, engineering, and construction market.
An Air Barrier is a system of building assemblies within the building enclosure – designed, installed and integrated in such a manner as to stop the uncontrolled flow of air into and out of the building enclosure. As new codes and construction requirements have been developed, air barrier system performance in the exterior walls, foundation/floors and roof system have been getting much more attention in the construction of high performance buildings. In fact, air-barrier systems in commercial/industrial buildings are estimated to reduce air leakage by up to 83 percent, save on gas bills by more than 40 percent and cut down on electrical consumption as much as 25 percent, according to simulations by the National Institute of Standards and Technology (NIST). Although the results of this particular NIST study have not yet been field verified, the results are compelling. Manufacturers and groups such as the Building Enclosure Council (BEC) have publicly confirmed the importance of air barriers to meeting energy benchmarks and to building performance and sustainability in general. Without an effective, continuous air-barrier system, conditioned air will escape through the building envelope and the heating, ventilation and air-conditioning (HVAC) system will be forced to work harder to maintain the indoor environment. And as the NIST report demonstrated, harder-working HVAC means higher energy bills. Statistics from the NIST and other academic and professional research groups have not only caught the attention of certain entities – such as the American Society of Heating, Refrigerating and Air-Conditioning Engineers (ASHRAE) and code officials in several states – they have also led to new awareness of the fact that air barriers can increase both the longevity and durability of the building envelope.
Air Barriers
The uncontrolled movement of air into and out of a building can have numerous detrimental effects. With the growing global awareness of energy use, buildings are quickly being recognized as the low-hanging-fruit of energy savings. The United States Department of Energy estimates that building operation accounts for roughly 40% of the nation’s energy expenditure not including process loads within the buildings. The majority of this energy is used to condition the indoor environment. Creating the separation from the outdoors to the indoor conditioned environment is a complex process that must take into account a variety of factors. The air barrier system is one component of this enclosure and works to stop air leakage. The three main forces causing envelope air leakage are:
Wind – Wind exerts rapidly changing pressures on the building envelope resulting in positive zones on the windward side(s) and negative zones on the leeward side(s).
Stack Effect – Rising warm air causes pressure differentials throughout the building’s interior which are generally positive at high levels and negative at low levels in the heating season and the opposite in the cooling season. This effect is only considered consequential in buildings taller than three stories.
Mechanical Systems – Heating and ventilation systems create positive or negative pressures (or both) within the building depending on its use.
Any one of these driving forces, or a combination of the three, can cause air leakage through cracks or gaps in the building envelope. Over the years, many strategies have been incorporated into the design and construction of buildings that have led to more energy efficient buildings, but the addition of a continuous air barrier to the building enclosure saves more than energy. In addition to combating energy loss through air leakage, the air barrier system works to improve the building enclosure by eliminating:
-
Occupant discomfort due to drafts
-
Degradation of the building materials due to interstitial condensation
-
Poor indoor air quality due to the ingress of fumes, dust, etc.
-
Inability to achieve required pressure conditions in controlled environments
-
Difficulties in balancing HVAC systems Noise transfer through leakage paths
-
Microbial growth within building cavities
Air flow has the ability to transport an estimated 30 to 200 times more moisture into and through the building enclosure system than occurs by vapor diffusion. This is not to discount the value of a vapor retarder, which cannot be forgotten in lieu of an air barrier but rather must be designed to work in harmony with one. The air barrier, unlike the vapor retarder, can be located anywhere in the envelope assembly because its function is to stop air movement, not control vapor diffusion. If the air barrier is placed on the predominantly warm, humid side (high vapor pressure side) of the enclosure, a vapor- impermeable product can be used and is called an “air and vapor barrier”. Conversely, if placed on the predominantly cool, drier side (low vapor pressure side) of the wall, the specified air barrier should be vapor permeable (5-10 perms or greater).
The current push for energy conservation bears many similarities to that of the 1970’s oil crisis and the obvious strategy of tightening our buildings is as applicable today as it was then. What was (and still is) often overlooked is that another strategy of increasing the R-value of our wall systems was incorporated. In the 1970’s, many buildings suffered from the adverse effects of improperly employed methods of energy conservation and this could potentially happen again today. In-wall condensation was a product of many failures in 1970’s era buildings and air tightness measures were often blamed incorrectly. When more insulation is added to the interior side of the wall system, less energy is lost through the wall and the condensation plane, the point at which the temperature reaches the dew point, moves inward. The addition of a vapor retarder worked to prevent this condensation by eliminating vapor diffusion but failed to address condensation from vapor laden air leakage. As the design and construction of today’s buildings requires greater insulation packages, we must be aware of the issues entailed in moving the dew point further inward in our building assemblies. Although strategies exist to negate this complication, such as including exterior insulation packages, none should be incorporated without a continuous air barrier system.
With this understanding, air leakage should never be considered as acceptable natural ventilation because it cannot be controlled or conditioned, and will not provide adequate or evenly-distributed ventilation. Ventilation of a building should be accomplished through a deliberate design strategy based on the assumption that the envelope will be relatively airtight. The design of an air barrier system is complex and requires an in- depth understanding of building science principles to be effective.
Design
As more buildings are being designed and built with air barriers, many new materials and construction principles have begun to surface. Like all building materials and systems, time will weed out the concepts that don’t work or are not constructible and certain strategies will become the predominant design standard. Despite the range of strategies, there exist certain principles governing the design and construction of an air barrier system that must be attended to prior to construction. The Air Barrier Association of America (ABAA) is the accepted authority of air barrier design and construction and has established a list of requirements that a system must meet to be considered an air barrier, including:
-
It must be continuous, with all joints sealed
-
The materials shall have an air permeability not to exceed 0.004 cfm/sf under a pressure differential of 0.3 in.
-
It shall be capable of withstanding positive and negative combined design, wind, fan and stack pressures on the envelope without damage or displacement, and shall transfer the load to the structure. It shall not displace adjacent materials under full load.
-
It shall be durable and maintainable
-
The air barrier shall be joined in an airtight and flexible manner to the air barrier of adjacent systems, allowing for the relative movement of systems due to thermal and moisture variations and creep. Connections shall be made between: foundations and walls, walls and windows or doors, different wall systems, wall and roof, wall and roof over conditioned space, walls to floor and roof across construction, control and expansion joints, walls floor and roof to utility pipe and penetrations
From a design perspective, the continuous air barrier must be included in the initial phases of the project to ensure the building is acceptable at delivery. There are a multitude of project delivery methods in use in the industry today, but the design-build sector is experiencing the largest volume of projects requiring continuous air barrier systems. Driving this demand are the United States Army Corps of Engineers (USACE) and the United States Air Force (USAF), which now require continuous air barriers in both new construction and building renovations. In cases such as these, the continuous air barrier must be factored in as early as the submittal to the original Request for Proposal (RFP), where it must be designed into an appropriate wall/roof/slab system and be accurately priced. Upon selection, the design team must prepare plans and specifications that account for proper design and clearly translate the project’s needs and goals to the contractor performing the work. Plans need to be drawn in such a way as to clearly show the boundaries of the air barrier and specific details at all critical interfaces.
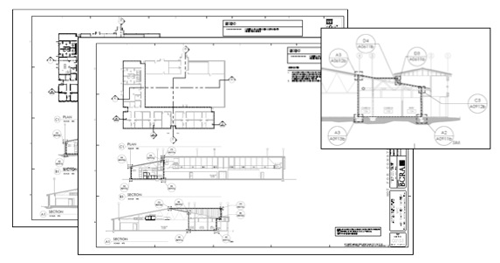
Figure 1. Plans showing detail and detail call-outs of the continuous air barrier
To many design firms, the air barrier is a new component with which they have little experience. As such, many design teams sub-contract with other air barrier consulting firms for this portion of the design process. Independent Technical Reviews (ITRs) are typically completed at 65% and 95% submittals to ensure proper design.
Construction
With the design documents in place, the next step towards creation of a successful air barrier system is the construction phase. Unfortunately, industry standard practices do not currently yield an air tight building regardless of what the design documents say. This is not necessarily due to an unwillingness to perform quality work but rather a lack of communication and air barrier specific expertise between the design team and contractor. It is thus essential that the air barrier be discussed in detail at the pre-construction meeting. Frequently, the project team finds it useful to construct a mock- up building section to familiarize themselves with materials selected and the way they are incorporated into the building enclosure. Feedback from the contractor during this process often provides the design team with a greater understanding of construction methods and encourages collaboration on solutions for even the most convoluted details. Throughout the construction phase, on-site observation by an air barrier consultant is recommended. This provides the opportunity for work to be observed for defects or errors, sample tests, the immediate answering of Requests-For-Information (RFI’s), and for an on-site representative to act as a liaison between the contractor and the materials manufacturer. This work is similar to that of a quality assurance engineer but specific enough to require an individual or group specialized in air barrier consulting.
Testing
Once construction of the building is complete, the performance of the air barrier system must be verified. Unlike other programs in the building community that support certifications through checklists or theory, the whole-building pressurization test measures actual conditions of a building’s performance. Air leakage is measured as the rate of leakage per square foot of external envelope per minute at a specific pressure differential between the interior and exterior environments (measured in cubic feet of air flow per minute per square foot of envelope – cfm/ft2). In order to determine the leakage rate of a building, the surface area of the air barrier (envelope) is calculated and divided into the measured air leakage flow. The ASHRAE handbook of fundamentals (2005) designates building air leakage rates of 0.1 cfm/ft2, 0.3 cfm/ft2, and 0.6 cfm/ft2 as “tight”, “average”, and “leaky”, respectively. The USACE has developed their criteria to allow no more air leakage than 0.25 cfm/ft2 with a pressure differential of 75 Pascals (0.03” w.c.). If a building is found to leak more air than this rate, it is considered a “failed” test and the contractor must find and fix air leaks until the building reaches the “passing” level. As new codes and requirements are brought to bear, similar requirements and directives will apply to high rise, commercial, and residential buildings depending on the relevant jurisdiction.
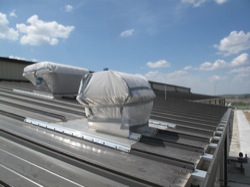
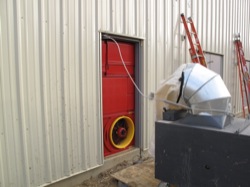
The test is accomplished through the use of industrial door fans that are placed in an exterior door (or several). These fans can range in size from single door units to large trailer mounted fans. Preparation for a test such as this involves a process of identifying and sealing all intended paths of airflow in to or out of the building envelope, shutting down HVAC systems and opening all interior partitions. This process may take less than an hour in a small building or a full day in a large or high-rise building.
 |
 |
|
|
Figure 2. In preparation for an air pressurization test the exhaust stacks are sealed off as they are understood to be a known or controlled air pathway |
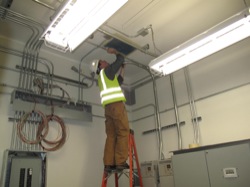
Figure 3. Some vents are more easily sealed from the interior |
Once this is complete, measurements of wind speed, temperature, and pressure (both interior and exterior) are taken to define any bias that may affect the final results of the pressure test. The pressure test can then be completed in one of two ways: a single point test or a multi point test. A single point test can be conducted by creating an interior/exterior pressure differential with the fan system and measuring the air leakage at a specific pressure. The building can either be pressurized or depressurized to obtain this result, but the most accurate result is produced by running both tests and averaging the two. If the pressure differential dictated by the applicable requirement cannot be met with the fan power available a multi-point test can be conducted ending on a lower pressure. By graphing the rate leakage as a function of pressure differential, the data can be extrapolated to determine a value for the specified test pressure. When testing complex or large structures, it is recommended that each form of testing be completed for both pressurization and depressurization to ensure that an adequate amount of data is collected.
 |
 |
|
|
Figure 4. Large multi-fan computerized systems are used for larger facilities |
Figure 5. Single fan units can be used to pressure test small buildings |
|
 |
 |
|
|
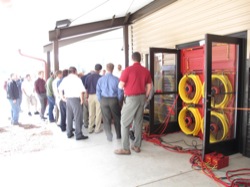
Figure 6. Multi-fan systems make it easy to transport equipment to test sites and set up in standard size doorways |
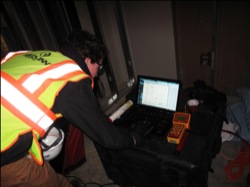
Figure 7. Monitoring equipment during testing |
Infrared in Building Air Leakage Testing
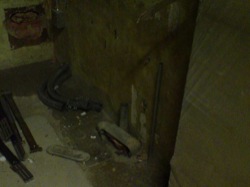
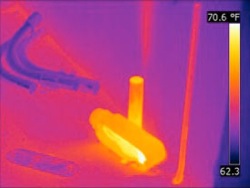
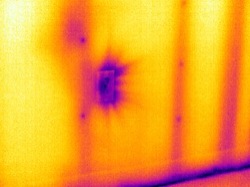
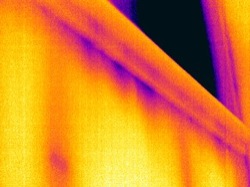
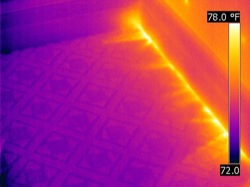
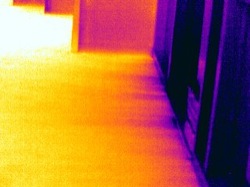
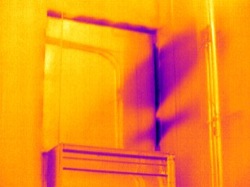
Whole building pressurization testing yields the overall leakage rate of the building and is accompanied by the use of infrared thermography to help visualize or locate actual leakage points and paths of flow through the enclosure. As the pressure differential is increased, more air will flow through points of leakage and is detectable with infrared thermography if there is a sufficient temperature differential between the exterior and interior. If the temperature difference between the exterior and interior environments is small, the tester can heat or cool (depending on the conditions) the interior spaces to exaggerate this temperature gradient. While infrared cannot “see” the air itself, the surface temperatures of building materials over which it flows are affected by it, which can be easily detected by infrared. This effect appears as a washing pattern in the infrared image as shown in Figures 8 and 9 where warm air from outside the enclosure leaked though an unused electrical conduit during depressurization testing. The conduit and junction box were heated and the air flowing out of the conduit stub upwards warmed the concrete wall directly behind it. This application of infrared thermography reveals a definite leakage pathway to report with pictorial documentation to support the claim. It is important to have infrared cameras with high resolution and high sensitivity to capture the narrow temperature gradients produced and more importantly, it is imperative to have highly qualified infrared thermographers with building science thermography experience to perform the testing and inspection. Thermographic air leakage patterns are often very subtle and diffuse, and without the proper equipment and personnel, air leakage pathways can be easily missed and other thermal anomalies can be incorrectly identified as air leakage.
 |
 |
|
|
Figure 8. Derelict conduit penetration in concrete slab |
Figure 9. Under depressurization warm air can be seen entering into the space and presenting a thermal anomaly on the concrete wall behind
|
|
 |
 |
|
|
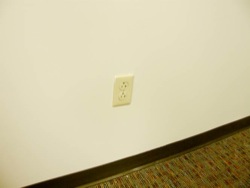
Figure 10. Interior wall outlet |
Figure 11. Infrared image showing cold air leakage around an interior wall outlet
|
|
 |
 |
|
|
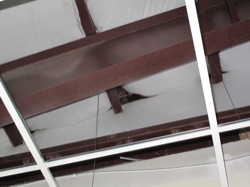
Figure 12. Underside of the super saver insulation scrim in a pre-engineered metal building |
Figure 13. Infrared image displaying warm air infiltrating through a poorly taped joint in the scrim
|
|
 |
 |
|
|
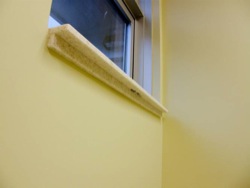
Figure 14. Window sill in a commercial facility |
Figure 15. Infrared image reveals air leakage at window sill while enclosure is depressurized
|
|
 |
 |
|
|
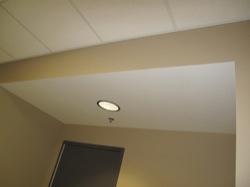
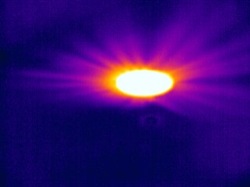
Figure 16. Recessed light penetrating the ceiling GWB that was intended to be the air barrier |
Figure 17. Infrared image reveals air leakage around recessed light while enclosure is depressurized
|
|
 |
 |
|
|
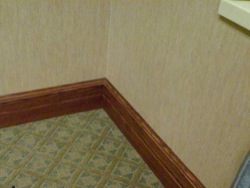
Figure 18. Base trim in a commercial facility with exterior wall on the right and interior wall across the top/left
|
Figure 19. Infrared image reveals air intrusion at base of wall while enclosure is depressurized |
|
 |
 |
|
|
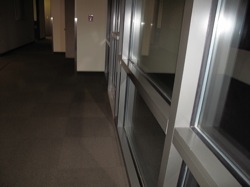
Figure 20. Exterior doors of an office building |
Figure 21. Infrared image showing air infiltration under the exterior storefront doors during depressurization
|
|
 |
 |
|
|
Figure 22. Infrared image showing air leakage from microwave/stove hood vents |
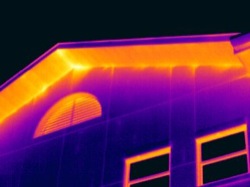
Figure 23. Infrared image showing air leakage at the wall to soffit transition
|
|
 |
 |
|
|
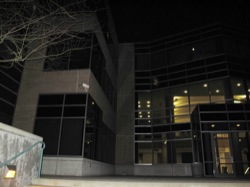
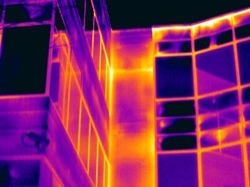
Figure 24. Exterior storefront and brick panel system of an office building |
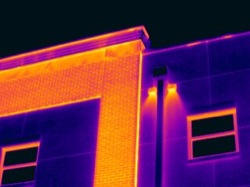
Figure 25. Infrared image showing air leakage at brick panel joints, coping, and around window frames
|
|
 |
 |
|
|
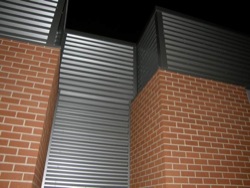
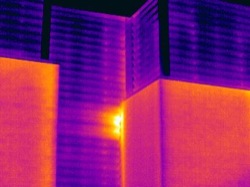
Figure 26. Corner joint between metal siding and brick veneer on a medical center |
Figure 27. Infrared image reveals air leakage at a corner joint between brick and metal siding |
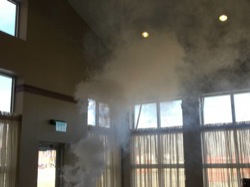
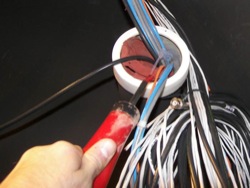
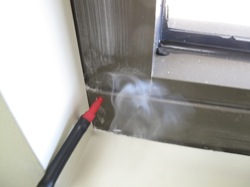
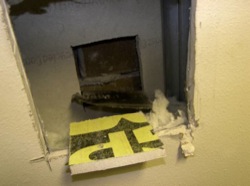
In addition to locating air leakage pathways with infrared thermography, techniques including smoke testing and invasive testing are routinely incorporated. Smoke machines, puffers or pens can be used to track air currents and confirm infrared imagery.
 |
 |
|
|
Figure 28. Theatrical smoke machine releases smoke inside of the enclosure. When building was pressurized the smoke could be tracked visually and was found to be exiting through the recessed lighting fixtures
|
Figure 29. A smoke puffer is used to track air leakage through an audio/visual cable conduit revealing a not so obvious short circuit for air leakage |
|
 |
 |
|
|
Figure 30. A smoke puffer is used to verify air leakage at a window assembly |
Figure 31. Invasive investigation reveals actual as-built conditions. Additionally, as each material is carefully excavated a pressure differential can be measured between material planes which helps to understand the root cause of failure in a forensic investigation of an air barrier system |
Large Building Air Leakage Testing
Performing an air leakage test on a small building or residential home can be a very simple and quick process for an experienced tester, but as the envelope increases and the height of the building rises, numerous complications enter the arena that must be considered. From a logistical perspective, performing a large test requires more powerful equipment with a higher degree of precision and accuracy and the use of many fan units is frequently necessary. The number of fans required to perform a test is dictated by the flow rating of each fan and the target air leakage flow volume. In a smaller building with few partitions and floors, even pressure distribution is easily achieved and fans may be placed in one location. However, a large building that is more internally complex requires that fans be placed in multiple locations in order to effectively pressurize or depressurize all interior spaces. The problem of pressure distribution gets more complicated still in buildings taller than three stories, at which point a phenomenon known as stack effect becomes a factor. Stack effect occurs in tall buildings possessing pathways for air to move vertically, typically in elevator shafts and stairwells. During the heating season, the air on lower floors is cooler and at a lower pressure. Buoyancy causes warm air to rise through the building, raising the pressure at the top of the building. In a leaky building, this temperature and pressure gradient draws cool air in through the base of the building and pushes warm air out at the top. During the cooling season the effect is reversed. Because of stack effect, even pressure distribution cannot be achieved by simply placing fans in exterior doors on the first floor. Fans must also be placed at the top of the building in order to exert a force on the internal air volume from both the top and bottom. To confirm distribution, pressure reference tubes are run to the bottom, middle, and top floors and monitored at a central location. With such a large volume of air to equalize, the tester must understand the dynamics of building pressure and air flow to be able to effectively decide where to place fans and how to distribute power to them to accurately test the building’s air leakage rate.
Case Study: Detroit Arsenal Building 270
BCRA was contracted by Granger Construction to provide consultation and testing for Building 270 at the Detroit Arsenal, Warren, MI. At eight stories, Building 270 was the first building in its height class to be tested for air leakage for the USACE and one of the largest buildings to be tested to date in the United States. BCRA had involvement during the construction phase of this project providing air barrier consulting through emails, phone calls, and a confidence test site visit.
All new construction and renovation for the USACE must be constructed with a continuous air barrier and be tested for air leakage prior to building turnover as dictated in each new RFP. The typical RFP requirement reads as follows:
a. Test the completed building and demonstrate that the air leakage rate of the building envelope does not exceed 0.25CFM/sq ft at a pressure differential of 0.3 in. w.c. (75 Pa) in accordance with ASTM E- 779 (2003) or E- 1827-96 (2002). Accomplish tests using BOTH pressurization and depressurization. Divide the average measured air leakage flow rate in both directions in CFM @ 0.3 in. wag (L/s @ 75 Pa) by the surface area of the envelope enclosed by the continuous air barrier of the building, including roof or ceiling, walls and floor to produce the air leakage rate in CFM/sq ft @ 0.3 in. wag (L/s.m2 @ 75 Pa). Do not test the building until verifying that the continuous air barrier is in place and installed without failures in accordance with installation instructions so that repairs to the continuous air barrier, if needed to comply with the required air leakage rate, can be done in a timely manner.
b. Test the completed building using Infrared Thermography testing. Use infrared cameras with a resolution of 0.1°C or better. Perform testing on the building envelope in accordance with International Organization for Standardization (ISO) 6781:1983 and ASTM C1060- 90(1997). Determine air leakage pathways using ASTM E 1186-03 Standard Practices for Air Leakage Site Detection in Building Envelopes and Air Barrier Systems, and perform corrective work as necessary to achieve the whole building air leakage rate specified in (a.) above.
The required test procedures were carried out with the use of a blower door test procedure, as well as infrared thermography of the building envelope during the door fan testing.
ASTM E779 and C1060 were followed as indicated in the RFP. ASTM E779 was used as the starting point in conjunction with the current USACE Air Tightness Testing Protocol for Large Buildings. The differential temperature stated in ASTM C1060 was not met but infrared cameras having a better sensitivity than stipulated were used and air leakage was clearly identified with only a seven degree Fahrenheit difference.
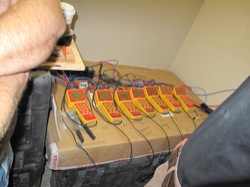
BCRA was prepared to use seven 8000 cfm fans to test the building. The construction of Building 270 consisted of slab on grade, a panelized concrete and window curtainwall system, a TPO roof membrane, and interior spray polyurethane foam. The building’s “Envelope” was calculated to be 144,622 ft2. The envelope was both pressurized and depressurized with the door fans per ASTM E779. Air flow readings were taken at twelve test pressures between 25 and 75 Pa, from which a correlation value showing the confidence and thus the reliability of the final 75 PA measurement was determined. Bias pressures and wind speed were also recorded and factored into the final measurement and reported as the “corrected air flow”. While the building was pressurized, infrared thermography was used to view the exterior of the envelope in an effort to observe any air leakage through the building’s envelope. While depressurized, infrared thermography was used on the building’s interior envelope surfaces to observe air infiltration.
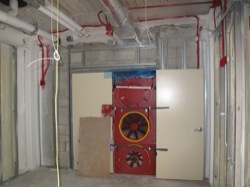
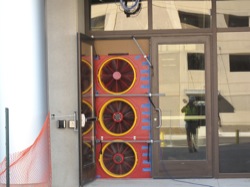
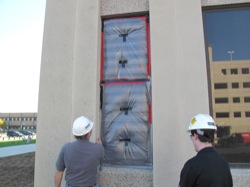
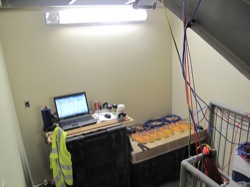
The setup for testing consisted of a complete building inspection and preparation procedure. All exterior doors were shut and locked. All interior doors were propped open. The HVAC system was shut down and louvers were confirmed closed or were sealed by BCRA. All plumbing traps were confirmed as being filled. Wind readings were taken and ambient temperature differential was confirmed. The door fan systems were set up on the first floor and penthouse level. Three fans were placed in the North entrance, two in the South connection to the adjacent building, and two at the top of the North stairwell. Pressure readings were monitored on the first, fourth, and eighth floors at points out of direct flow of the fan to confirm uniform pressure distribution within the building as dictated by the testing protocol.
 |
 |
|
|
Figure 32. Door fans set up in the South connection to the adjacent building
|
Figure 33. Door fans set up in the North exterior door |
|
 |
 |
|
|
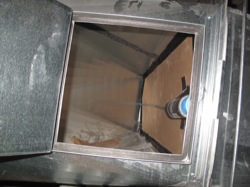
Figure 34. Temporary air sealing inside stairwell air supply ductwork |
Figure 35. Temporary air sealing on exterior louver
|
|
 |
 |
|
|
Figure 36. Testing station at the base of North stairwell |
Figure 37. Data acquisition units that relay to the computer station |
During the pressurization and depressurization of the building, BCRA surveyed the exterior building envelope using infrared cameras with a resolution of 0.05 degrees C and performed the testing on the building envelope in accordance with ISO 6781:1983 and ASTM C1060-90. BCRA was able to determine air leakage pathways using ASTM E1186-03, Standard Practices for Air Leakage Site Detection in Building Envelopes and Air Barrier Systems. Thermal anomalies representing air leakage were verified with the use of hand held smoke puffers.
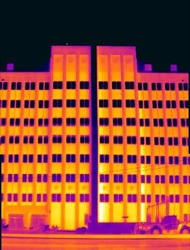
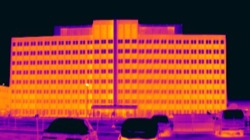
The performance verification test generated the result of an air leakage rating of 0.17 cfm/sf at 75 Pa pressure differential with an r2 correlation coefficient of 0.996. Infrared thermography showed very few locations of air leakage. Based on the data acquired from door fan testing and thermal imaging, the air barrier construction in the building met the air leakage rate requirement set forth in the RFP by the USACE.- online PR
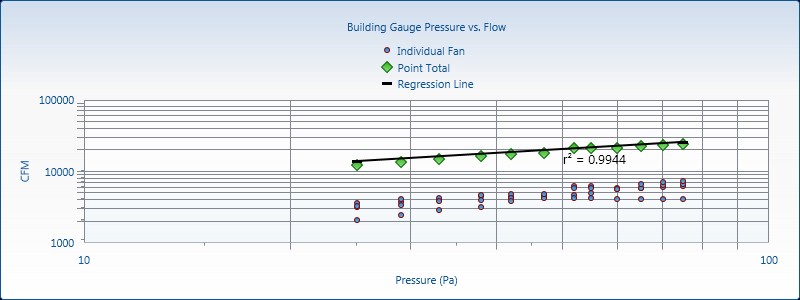
Figure 38. Testing Data for Depressurization Set
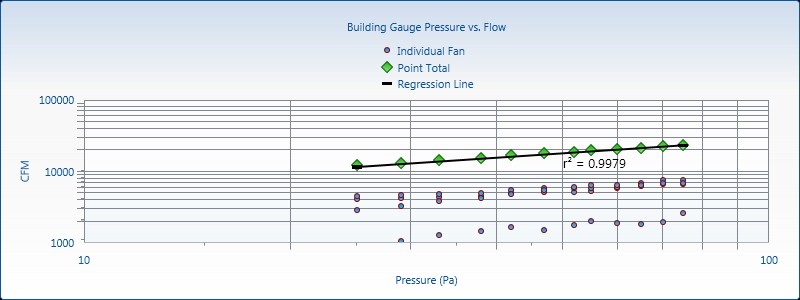
Figure 39. Testing Data for Pressurization Set
Air leakage was observed in the following locations:
1. Around exterior door assemblies
2. Mechanical ductwork in the penthouse and louvers in first floor mechanical rooms
3. Channel flow in the mechanical shaft and stairwell interstitial space
4. Equipment hoist hatch in the penthouse floor
 |
 |
|
|
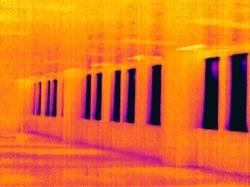
Figure 40. Infrared image of exterior windows on the second floor showing no thermal anomalies
|
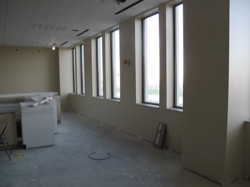
Figure 41. Corresponding visible light image |
|
 |
 |
|
|
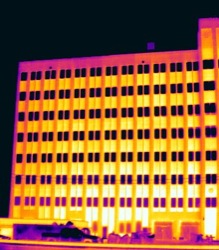
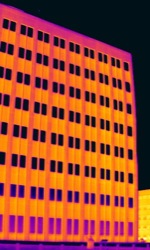
Figure 42. Infrared image of the Northwest face of the building showing no thermal anomalies
|
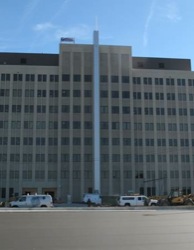
Figure 43. Corresponding visible light image |
|
 |
 |
|
|
Figure 44. Infrared image of the central West face of the building showing no thermal anomalies
|
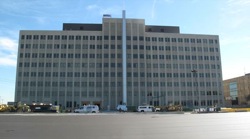
Figure 45. Corresponding visible light image |
|
 |
 |
|
|
Figure 46. Infrared image of the West face of the building showing no thermal anomalies
|
Figure 47. Corresponding visible light image |
|
 |
 |
|
|
Figure 48. Infrared image of the Southwest Figure |
49. Corresponding visible light image face of the building showing no thermal anomalies
|
|
 |
 |
|
|
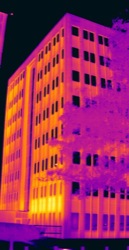
Figure 50. Infrared image of the Southeast corner of the building showing no thermal
|
Figure 51. Corresponding visible light image |
|
 |
 |
|
|
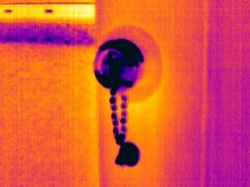
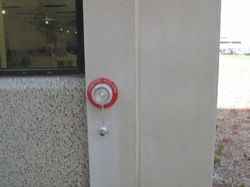
Figure 52. Infrared image showing minor air leakage around a fire protection spigot
|
Figure 53. Corresponding visible light image |
|
 |
 |
|
|
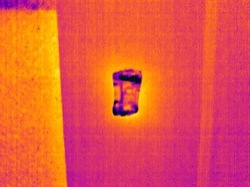
Figure 54. Infrared image showing minor air leakage around an exterior electrical outlet
|
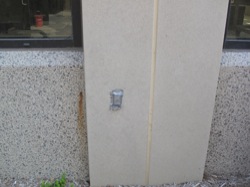
Figure 55. Corresponding visible light image |
|
 |
 |
|
|
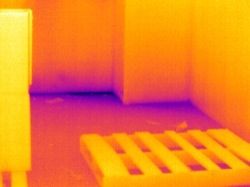
Figure 56. Infrared image showing thermal bridging and possible air leakage into the Northeast mechanical room
|
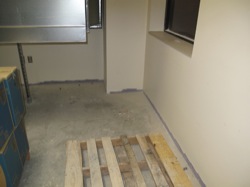
Figure 57. Corresponding visible light image |
|
 |
 |
|
|
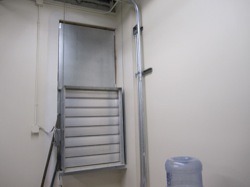
Figure 58. Infrared image showing air leakage around a mechanical louver
|
Figure 59. Corresponding visible light image |
|
 |
 |
|
|
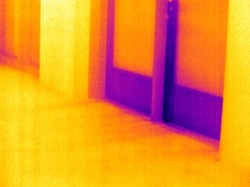
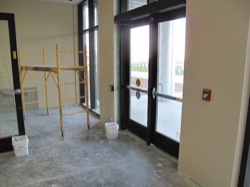
Figure 60. Infrared image of the East building entrance showing minor air leakage around the doors.
|
Figure 61. Corresponding visible light image |
|
 |
 |
|
|
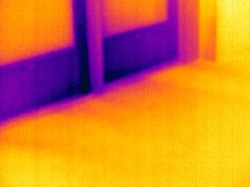
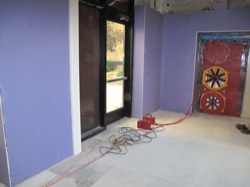
Figure 62. Infrared image showing air leakage around an exterior door in the South building connection
|
Figure 63. Corresponding visible light image |
|
 |
 |
|
|
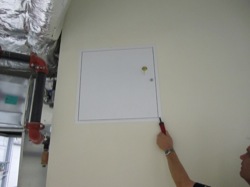
Figure 64. Air leakage was observed through the access door in the mechanical penthouse wall |
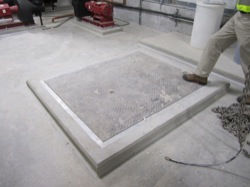
Figure 65. Air leakage was observed through the equipment hoist hatch in the mechanical penthouse slab |
Conclusion
The increasing inclusion of air barriers in new and renovation construction represents a large step forward in improving the energy efficiency, longevity, and occupational comfort of the buildings in which we live and work. It is not a new concept, but until recently, air barriers were not well understood and gained little headway.
Recent decades have seen a concerted effort towards improving our knowledge of building science principles, which has allowed for innovation in building materials, design, and methods of construction. The mandate by the USACE for the inclusion of air barriers has forced the industry to show that air tight buildings can be built and data is beginning to be collected supporting the claim that quantifiable savings are realized as a result. But, experience in the design, construction, and testing of air barriers is still limited to a small number of firms and the past three years have shown the necessity for the involvement of experts in building science and infrared thermography.
Although significant, the gains from military buildings will likely be modest in comparison to the energy savings realized from the inclusion of air barriers in commercial and high rise buildings. New codes and regulations will be a struggle to meet in the beginning years as more firms become proficient in the design, construction, and testing of air barriers, but the steep learning curve will lead to new innovations that work towards increasing the overall sustainability of buildings.


